Local Email System
(This passage contains 0 words)
Though email communications have become a less popular choice compared with instant messaging softwares, they are still an important part of the online communication system. Having a domain and a server means we can build up our own email system to represent ourselves. In my case, the challenge not only lies in the distributed system consisting of an FRPS and an FRPC (See the previous chapter), but also maintaining the balance between web service and email service on one server.
System Requirements
- 1. (At least) 2-core CPU and 4GB memory: Important if you don't want your server to crash.
- 2. Port 25 allowing incoming traffic: Not necessary to use port 25 for outward traffic. It is usually banned by ISPs due to spam regulations so we won't use this port to send emails.
Install Mailcow
There are a variety of choices when deciding which email server to be used. The most important components of a email service system are Postfix (or Sendmail) and Dovecot. Postfix is a mail transfer agent (MTA), responsible for sending and receiving emails, while Dovecot is a mail delivery agent (MDA) that manages the storage and access of emails (Dovecot also makes it easier to access email service via clients such as Outlook and Thunderbird that support IMAP and POP3). After installing these softwares, you also need to handle the connection between them to make them function correctly and safely. There could be a long learning process if you are new to email systems. So a reasonable alternative could be a all-in-one, lightweight software which has configured these components in advance.
Many softwares are capable of this. Here I have chosen Mailcow because it's open-source, lightweight and user-friendly. You may want to choose other softwares such as iRedMail and Mail-in-a-Box. As a start, we need to install and configure Docker since Mailcow is a docker application. You can pass this chapter if you already have docker installed on your system.
Install Docker
We will use apt as our package manager. For non-apt users, you may refer to Docker's official website to install yours. You can run the following code to install Docker CLI for your system.
sudo apt update && sudo apt upgrade -y  # update apt
sudo apt install -y apt-transport-https ca-certificates curl gnupg lsb-release  # install docker dependencies
curl -fsSL https://download.docker.com/linux/debian/gpg | sudo gpg --dearmor -o /usr/share/keyrings/docker-archive-keyring.gpg  # install official gpg
echo "deb [arch=$(dpkg --print-architecture) signed-by=/usr/share/keyrings/docker-archive-keyring.gpg] https://download.docker.com/linux/debian $(lsb_release -cs) stable" | sudo tee /etc/apt/sources.list.d/docker.list > /dev/null  # add official source for docker
sudo apt update  # update apt index
sudo apt install -y docker-ce docker-ce-cli containerd.io  # install docker
You may test your installation with sudo docker --version after running the previous code. It is optional but recommended to users in China to add mirror sources to your Docker daemon. You can open and edit /etc/docker/daemon.json and add the following lines into the configuration (Here we use a USTC mirror. You can configure your own.):
{
    "registry-mirrors": [
        "http://mirrors.ustc.edu.cn/"
    ]
}
And then restart the service (No need if you don't add the mirrors).
sudo systemctl reload docker-daemon
sudo systemctl restart docker-daemon
sudo docker info  # [optional] see if these sources have been added
Configure Dockerized Mailcow
After installing Docker, you can refer to the official documentation of Mailcow to have it installed to the right place:
cd path/to/installation
mkdir mailcow && cd mailcow
git clone https://github.com/mailcow/mailcow-dockerized
cd mailcow-dockerized
After downloading the necessary files, we need to generate a configuration file which we will use later to set up the system. You can simply run the following command as root within that installation directory.
sudo ./generate_config.sh
Just follow the instruction and fill in the information Mailcow needs. Notice that Mailcow (and many other email systems) requires a fully qualified domain name (FQDN) consisting of a host name and a domain name. For example, you can choose mail.<your_domain> as your FQDN. After generating the configuration file, we can configure Mailcow by editing mailcow.conf to specify the ports and other components we use for our email system. If you are also running a web server like me, or any other web service on some specific ports, you need to be careful about this step, especially the following four lines:
HTTP_BIND=127.0.0.1  # fill in a local IP
HTTP_PORT=80         # choose another port if 80 has been occupied

# configure HTTPS like HTTP
HTTPS_BIND=127.0.0.1
HTTPS_PORT=443
And remember to avoid using the ports Mailcow suggests you to avoid like 8081, 9081 and 65510. If you are using intranet penetration like me, you need to use the right port as configured by your intranet penetration utility (For example, I'm using port 4000/tcp for my Mailcow server in FRP). Ports are basically the only thing you need to modify manually in the configuration file, but you can use your own configuration if there's a need. Now we pull and start the service by running
sudo docker compose pull     # use docker-compose instead of
sudo docker compose up -d    # "docker compose" if you installed it
Now your Docker will automatically pull the Mailcow images and create the containers according to your configuration. This process usually takes a few minutes depending on the network speed.
Open Necessary Ports
While Docker is building the Mailcow container, we can consider the ports we are using. These ports are generally configured in the mailcow.conf file. Also we have to pay attention to some other ports listed here. You can use the following commands to allow the most important ports if you are using FirewallD (Replace the ports with your own).
sudo firewall-cmd --zone=public --add-port=<BIND_HTTP_port>/tcp --permanent  # HTTP
sudo firewall-cmd --zone=public --add-port=<BIND_HTTPS_port>/tcp --permanent  # HTTPS
sudo firewall-cmd --zone=public --add-port=25/tcp --permanent       # SMTP
sudo firewall-cmd --zone=public --add-port=456/tcp --permanent      # SMTPS
sudo firewall-cmd --zone=public --add-port=587/tcp --permanent      # Postfix Submission
sudo firewall-cmd --zone=public --add-port=143/tcp --permanent      # IMAP
sudo firewall-cmd --zone=public --add-port=993/tcp --permanent      # IMAPS
sudo firewall-cmd --zone=public --add-port=110/tcp --permanent      # POP
sudo firewall-cmd --zone=public --add-port=995/tcp --permanent      # POPS
sudo firewall-cmd --zone=public --add-port=4190/tcp --permanent     # Dovecot Sieve
Do remember to allow these ports in your security group if you are renting a server.
To check whether these ports are allowed or not, you can use
telnet localhost <port>
Replace <port> with any port id that you want to test. If the port is not allowed in either the firewall or security group rules, telnet will be stuck at the trying step. If you have enabled the port, you will see "Connected to localhost". You might see that the connection is closed by the remote, which is not worth worrying since it's possibly because there's no active program listening to the port.
A full check on the ports is always recommended since there might be all sorts of problems you will encounter later, and excluding port problems from your suspicion list will surely reduce your stress at that time.
Configure Mailcow
We have configured the ports of Mailcow previously. Docker environment and the ports are like the hardware where Mailcow is build on, while we now have to configure the "software" part by specifying mailboxes and relay hosts before we can send the first email.
Administrative Login
Now you can access Mailcow's web UI by visiting https://localhost:<HTTPS_BIND_port>, or by visiting your FQDN. You will see the following page if you have configured everything correctly.
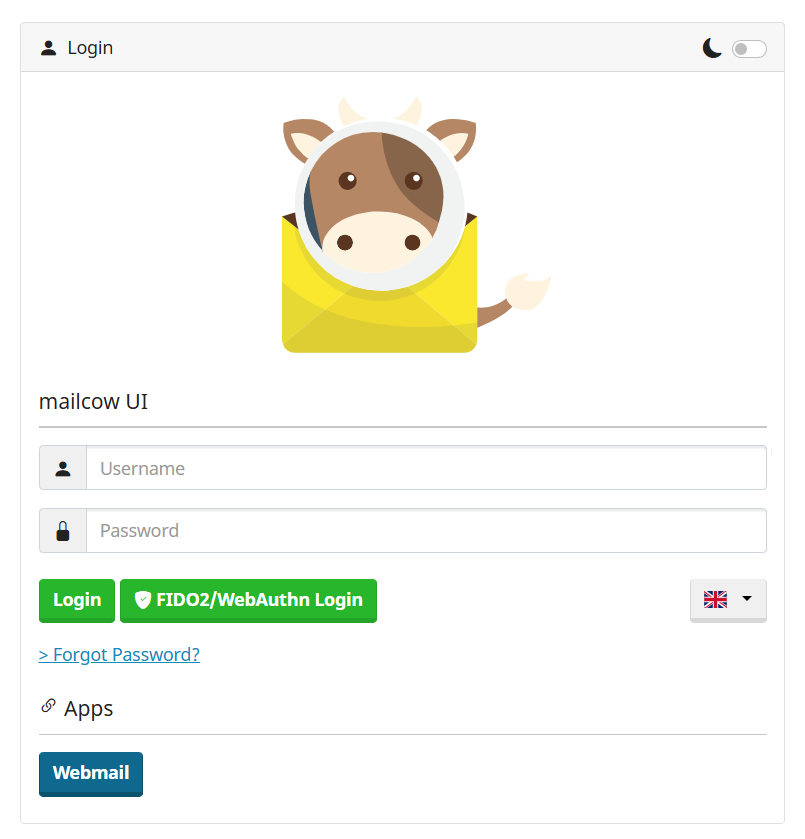
Mailcow Login
The default account is admin, and the password is moohoo. If you don't see it, you need to test the ports (especially the ports you configured for HTTP_BIND and HTTPS_BIND). You can also use sudo docker ps to see if all the components of Mailcow are working, especially mailcow/nginx and mailcow/sogo. If any of them is not working, you can check the logs by running
sudo docker logs -f <container_id> # replace the id with the true one (use docker ps)
or rebuild the containers by
sudo docker compose up -d
After logging in the service, you need to change your admin password immediately. You will see the option in System → Configuration → Edit administrator details → edit.
Relay Host
A relay host is a server that receives and transfers emails from one end to another. Usually ISPs have banned port 25 which is an important port in SMTP. So you can set up a proxy server where you send your emails and let it send them out. Such a proxy server is called a relay host.
It is not always necessary to use an external server as your relay host if port 25 on your server is open for outward traffic. In such cases the relay host of your system is your server itself. But in other cases, choosing a third-party relay host can be more beneficial since they are usually more stable and more renowned (Later we'll talk about the reputation of email servers). There are many third-party SMTP relay host providers, and I'm working with MailerSend (Not a commercial; You can always choose your own provider). Just sign up for an account and set up your domains. A free plan usually include hundreds to thousands of emails a month, which is absolutely sufficient for single-person usage.
After setting up your account, you will find an SMTP account (and password) in the control panel of your relay host provider. There is also an SMTP URL (like smtp.mailersend.com:587) that you can use to forward your emails.
Now let's turn back to Mailcow and set up the relay host. Go to System → Configuration → Routing → Sender-dependent transports → Add sender-dependent transport. You can now fill in the URL of your relay host with the correct account name and password you get from your relay host provider. Click Add if you finish.
Add Domain and Mailbox
A domain means the right-side part of your email address. Go to E-Mail → Configuration → Domains → Add domain. You need to fill in the necessary information about your domain and click Add domain and restart SOGo (Your default WebMail backend). Now we click Edit next to the domain you just added, choose the relay host you just added in sender-dependent transport. You don't have to choose ANY of the relay options at the bottom except Global Address List unless you really need to. A misconfiguration of these options will lead to loop forwarding in the end. So just click Save changes after choosing the right relay host.
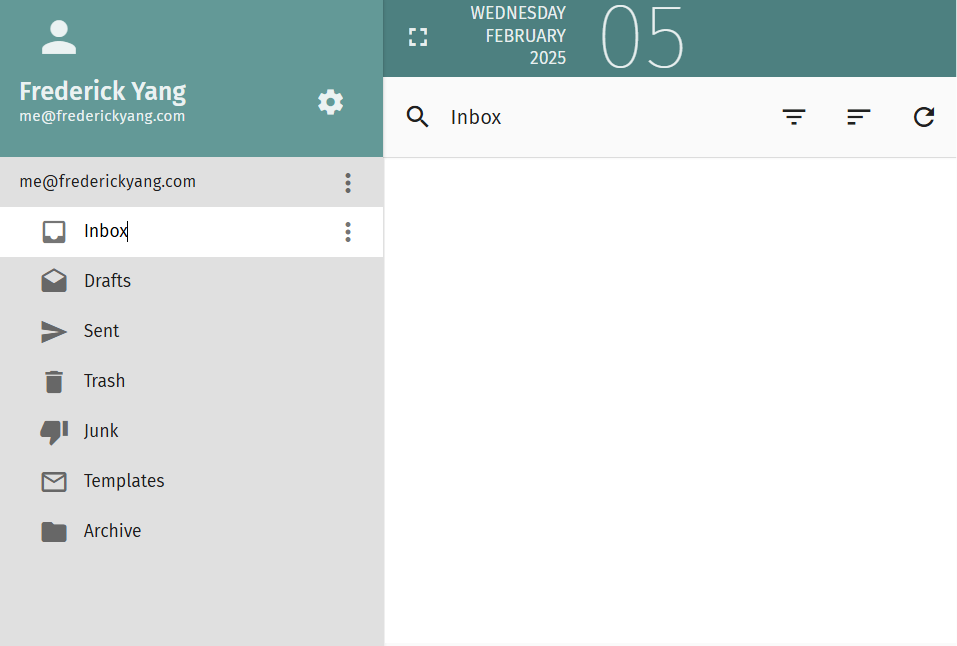
Adding a mailbox is similar. First we go to the Mailboxes tab which is just on the right side of Domains. Here you can add any mailbox of any username just as you like. You can log in the using the correct username and password in your web mail now (Go to Apps → Webmail). Here is the web mail page if you log in.
Mailbox
Configure DNS
DNS resolution is a crucial part of communication via emails. When building websites, we need to add A/AAAA records to our domain to make sure that incoming requests can be routed to the right IP. In email communications, DNS records play an important role in ensuring efficiency and security.
Now we will introduce six most basic DNS records and how to configure them correctly. I will use Cloudflare as my DNS manager, but you can choose your own. First, let's move to where the DNS records are configured. For Cloudflare users, that would be Your Domain → DNS → Records (See the following figure).
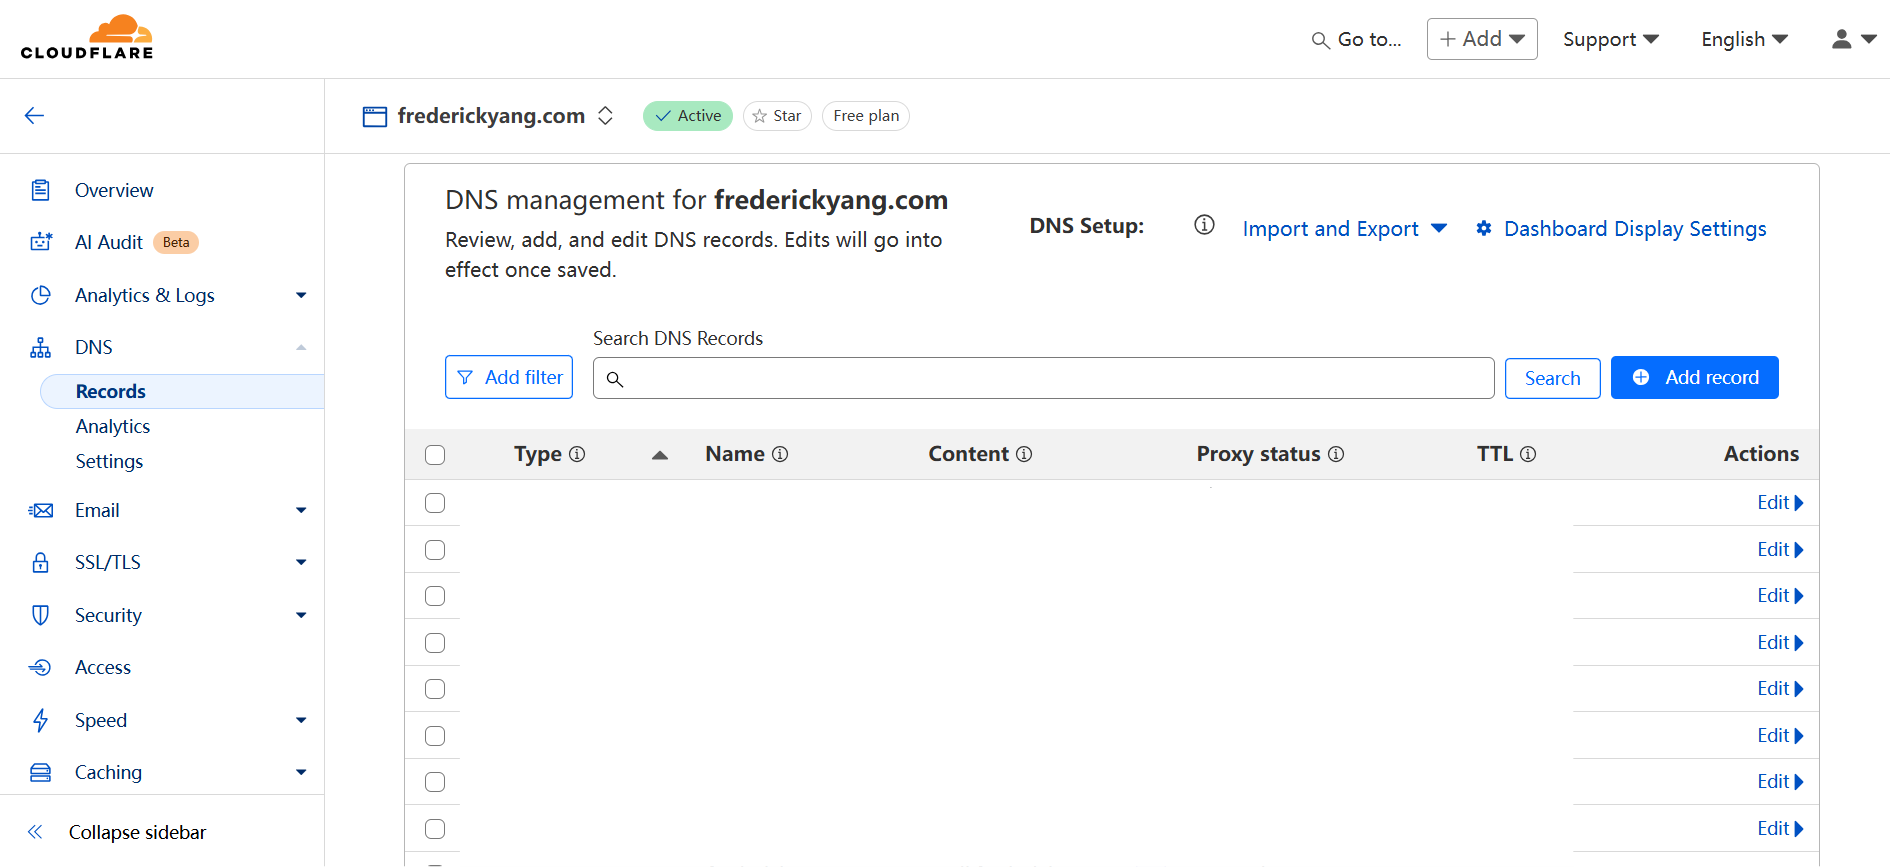
DNS Management
Your Records Will Appear Here
A/MX/SPF
The first DNS record you should add for your email server is the A/AAAA record of your FQDN. You need a record to make your FQDN point at the IP of your email server. For example, the name of this A/AAAA record can be mail.your_domain, while the IPv4/v6 address can be the public IP of your server. The following record is an example for this.
[ type     ]   A
[ name     ]   mail.frederickyang.com    (FQDN)
[ content  ]   xxx.xxx.xxx.xxx           (public IP)
The second important DNS record is called MX record (Mail eXchange record). This record binds the domain of the email address (texts to the right of @) with the mail server, i.e. your FQDN. The MX record could be something like
[ type     ]   MX
[ name     ]   frederickyang.com         (domain; you can write @ for short)
[ content  ]   mail.frederickyang.com    (FQDN or email server)
[ priority ]   10                        (lower number → higher priority)
The third record is called an SPF record (Sender Policy Framework). It is developed to prevent email spoofing when unauthorized attackers use your domain to send emails on your behalf. In this record we need to list all the authorized or trusted sources that emails on your behalf can be sent from. SPF record is defined in a TXT record whose value is in a plaintext form. The following is an example:
[ type     ]   TXT                       (we write SPF in TXT records)
[ name     ]   frederickyang.com         (domain; you can write @ for short)
[ content  ]   v=spf1 include:<spf_configuration> ip4:<trusted_ipv4_addr> -all
Now we explain the keywords in SPF contents. First, v=spf1 indicates that this TXT record is an SPF record. include: stores some domain name whose SPF records are included. You can write some specific domain provided by your relay host provider if there is one (like _spf.google.com or _spf.mailersend.net). ip4 is the authorized IPv4 address of servers that can send emails on your behalf. -all suggests that all emails failing to match your SPF record should be denied and marked as spoofing. You can also use ~all to indicate a soft fail that's less strict than -all, or ?all for a neutral attitude (not recommended of course).
DKIM
A DKIM record is short for DomainKeys Identified Mail, which is also a email-spoofing protection method like SPF. It provides the recipient a way of verifying that the email is indeed sent from its claimed source, and its contents remain unchanged after that.
To generate a pair of DKIM public and private keys, you can manually install DKIM utilities such as OpenDKIM, or a better alternative is to use the service provided by Mailcow. First, go to the domain settings in administrator interface and edit your domain. You will see at the bottom the DKIM options (See the following figure). You can create a new TXT record as follows.

DKIM in Mailcow
[ type     ]   TXT
[ name     ]   dkim._domainkey       (not your domain name)
[ content  ]   v=DKIM1; k=rsa; p=<past_from_mailcow/generate_your_own_pubkey>
DMARC
A DMARC record, or Domain-based Message Authentication, Reporting and Conformance, is also a record that helps prevent email spoofing. It defines how a recipient can handle an email that declares to be sent from your domain when it fails to pass certain authentication checks such as SPF and DKIM. Similar to SPF and DKIM, DMARC is written as a TXT record with v=DMARC1. There are three policies you can specify with key p=: none (do nothing), quarantine (mark as spam) and reject. You can also specify rua=mailto:<email> and ruf=mailto:<email> for where aggregate DMARC reports and failure reports will be sent. The following is an example:
[ type     ]   TXT
[ name     ]   _dmarc
[ content  ]   v=DMARC1; p=none; rua=mailto:some_email; ruf=mailto:some_email;
PTR
A DNS pointer record (PTR) is used in reverse DNS lookups, which means you can find which domain names are bound with a specific IP. This is usually done by your ISP or cloud service provider and you can contact them to set up a PTR record for you. When your recipient is receiving your email, it will look up the PTR record of your sending IP with the domain name it declares to be.
After your ISP finish configuring your PTR record, you can use the following command to check if it's successful:
dig -x <your_ip>
The answer part should contain something like "PTR <your_domain>". If you see this, your PTR record is successfully set.
After setting all the records above, you can manually set some other records recommended by Mailcow or other email service providers such as your relay host. You can check the validness of your DNS records by visiting MXToolbox, a website that tests your configuration of DNS records regarding email services.
Send Your First Email
By now you should have configured everything you need if you have passed the MXToolbox DNS check. You should be able to send your first email now. First, let's move to the Mailcow interface and access your web mail site (Go to Apps → Webmail). You can log in your web mail with the username and password you set in your mailbox.
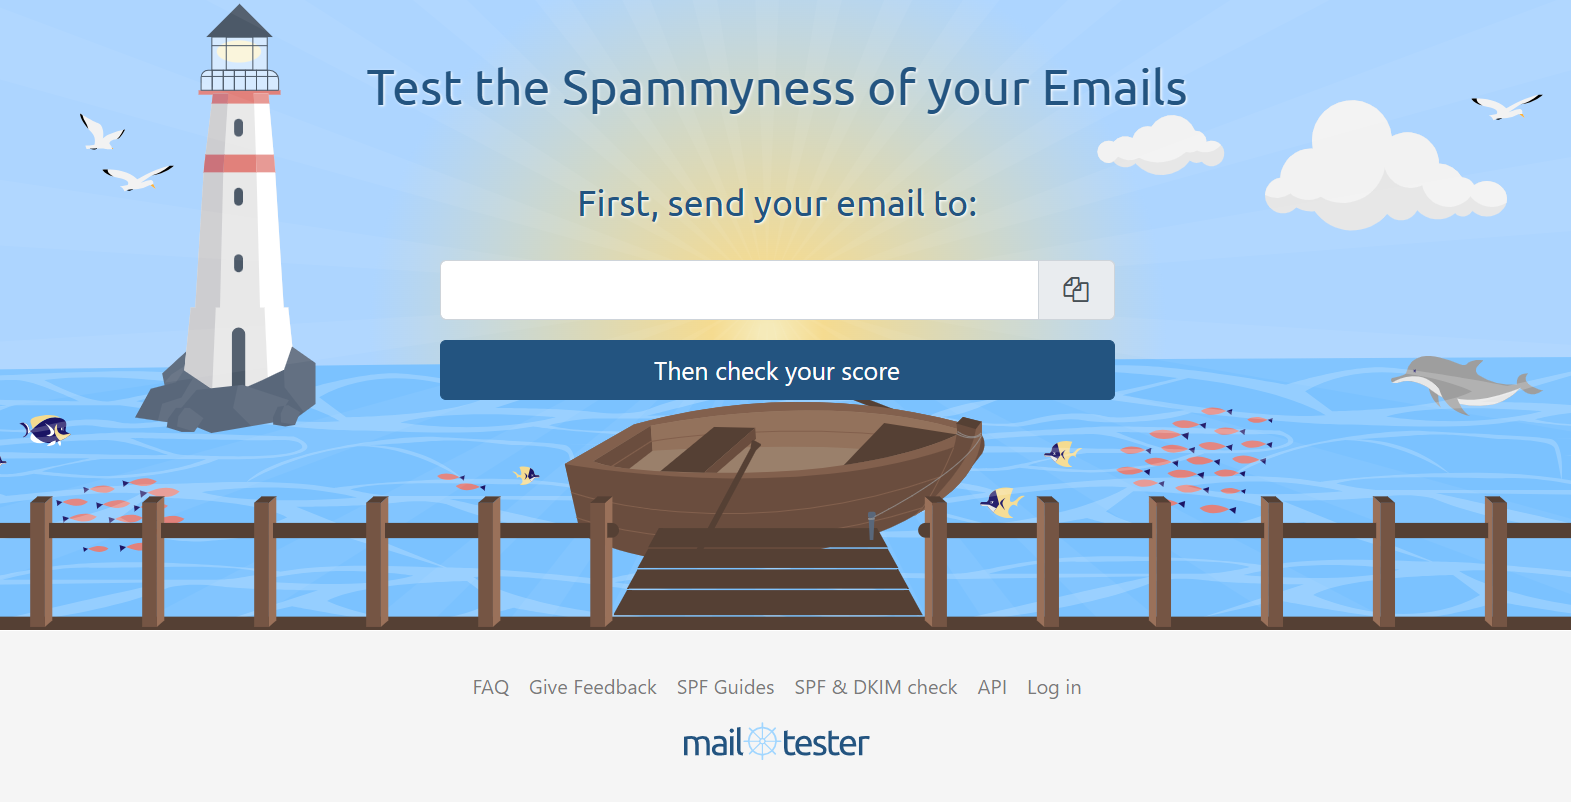
Now I would recommend you perform a simple test on your email server before sending anything to a known email provider such as GMail, iCloud or Outlook. You can visit Mail-Tester, a website that features in testing email configurations.
Mail-Tester
You can send an email of any subject to the mailbox it provides, click "Then test your score" to get a result. If your email service is well-constructed and ready to use, you should receive a high score (with a maximum of 10). A score lower than 5 indicates that there's something wrong or incomplete in your configuration.
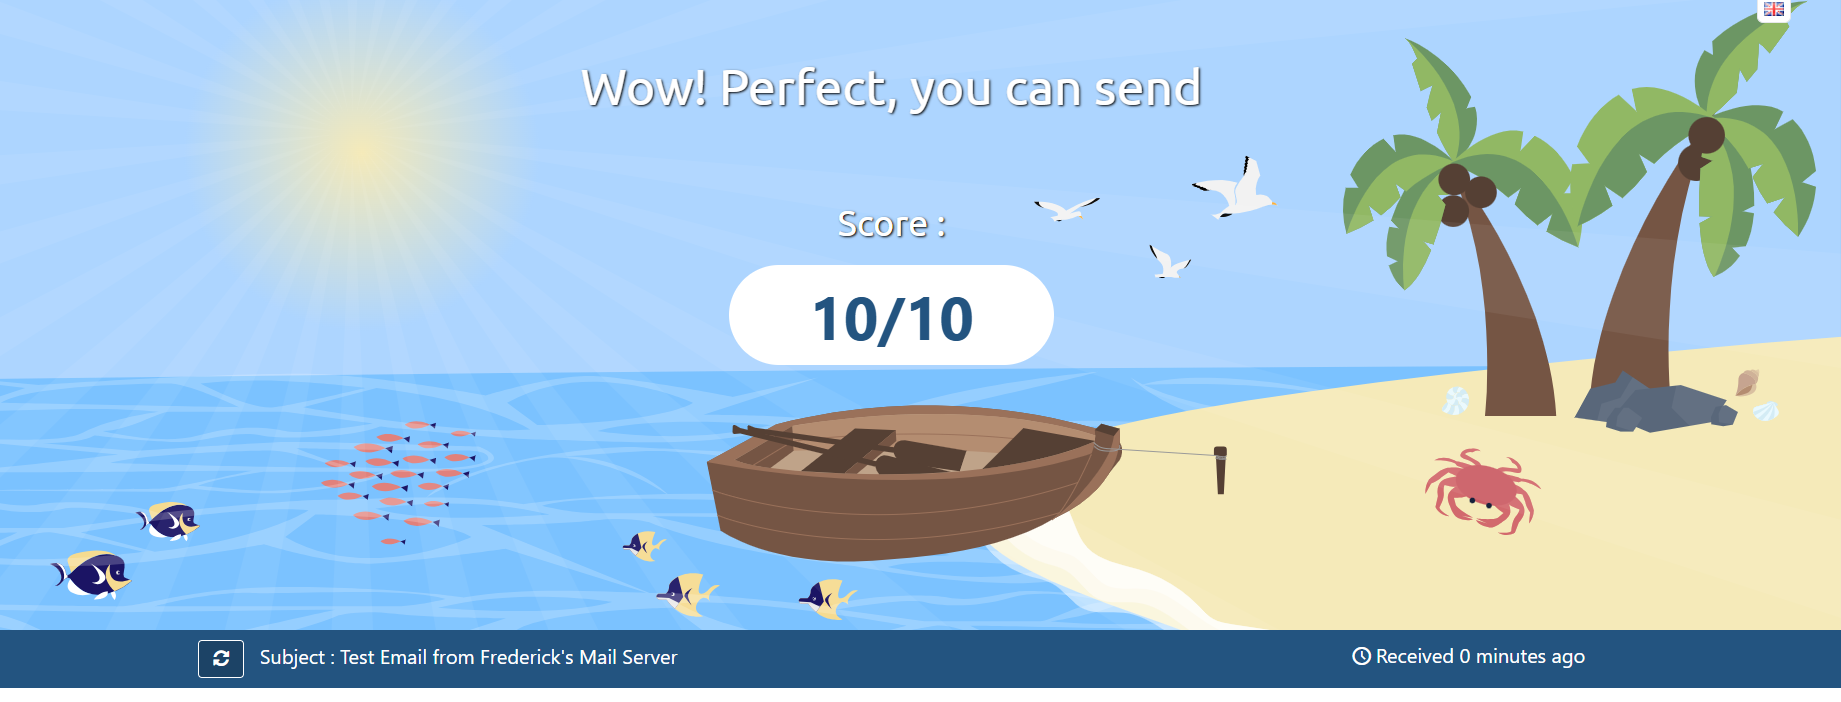
Mail-Tester Success
You can follow the guidance of Mail-Test to make your email system more reliable. Now you should be able to send emails with your own email server. If you have successfully built your own server, you can contact me and let's celebrate your success.